Archiving to Preserve Your Media
When your current project has been completed, we encourage you to Archive your camera – or the entire site when multiple cameras are in use. The benefit of archiving includes the ability to easily organize your projects, and prepare your camera for its next job. By Archiving, you’ll avoid having media from various projects stored in the same place within SiteCloud.
Archiving accomplishes this by removing media from a completed project, clearing the camera’s Captured Images pane to give you a blank slate for your next project.
This process will allow you to continue to access your finished project’s media, including all On-Demand, Time-lapse (MC-series cameras) or Motion Triggered (SiteWatch series cameras) images. Any DVR footage which has been downloaded to the camera’s Capture Images pane will also be archived.
Archived cameras and sites allow you to continue to use SiteCloud features, including time-lapse video creation, image weather stamps, annotating, tagging, deleting and exporting images.
To Archive a single camera, follow these steps:
-
-
-
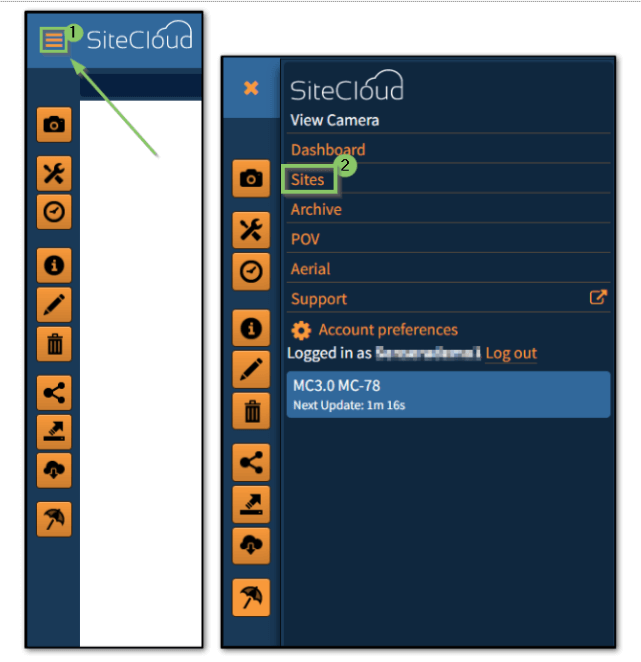
- While logged into Sitecloud, click the button in the top left corner of the page to open the Page Navigation Window
- Click on the “Sites” page button
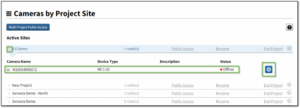
- Choose the correct site name under “Active Sites” to expand the list and view cameras located in this site
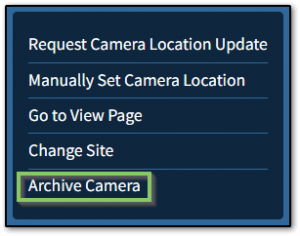
- Once you choose the camera you wish to archive in the list, and click on the gear wheel icon on the far right – then select “Archive Camera”
- Set the effective date for the archive – all images on the camera prior to and including this date will be part of the Archive Please note: If the Effective Date is set to the current date, the camera schedules will be disabled to prevent accidental data usage after the project end date.
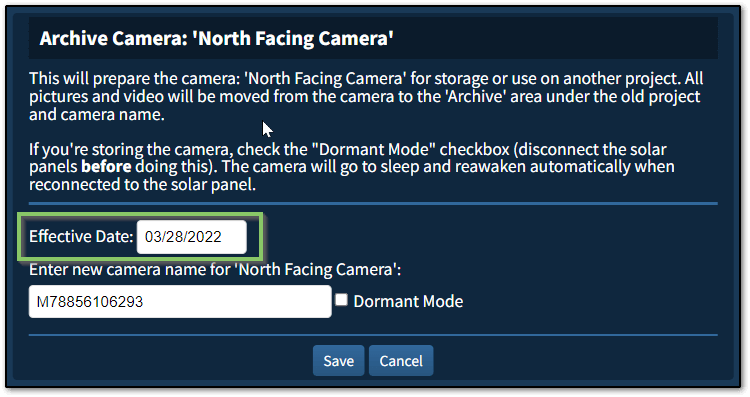
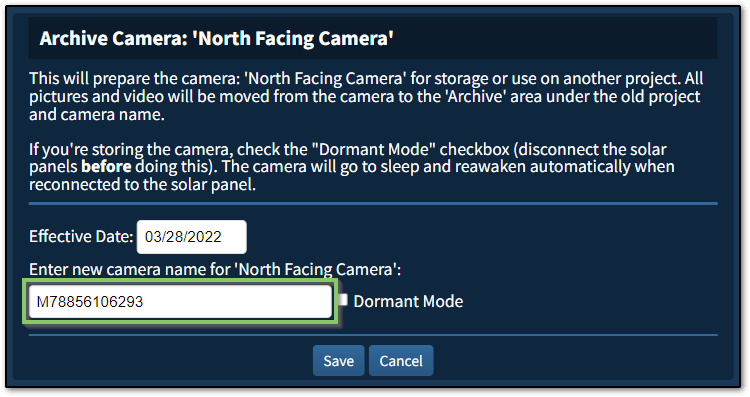
- Designate a new camera name for the next project the camera will be moved to. If you do not yet have a new project or name for the camera in mind, you can use a placeholder, like “Ready for New Project”.Please note: The archived project will be found under the old camera name.
- Next, check the box next to “Dormant Mode” to put the camera in Dormant mode, which will help preserve its batteries during storage.
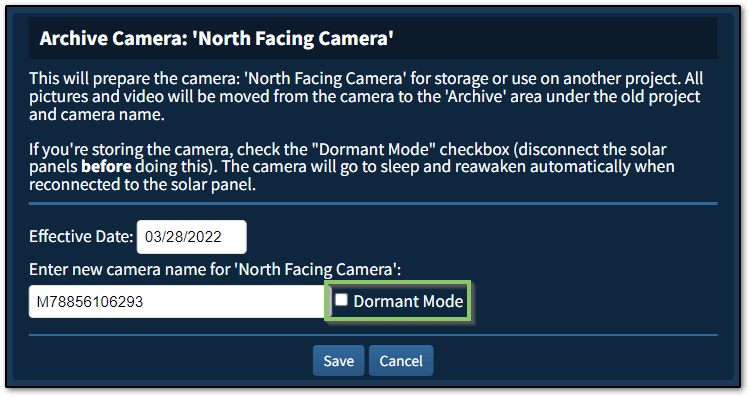
- Be sure to click ‘Save’

-
-
If you have a site with more than one camera that all need to be Archived, you can follow these steps:
-
-
-
- While logged into Sitecloud, click the button in the top left corner of the page to open the Page Navigation Window
- Click on the “Sites” page button

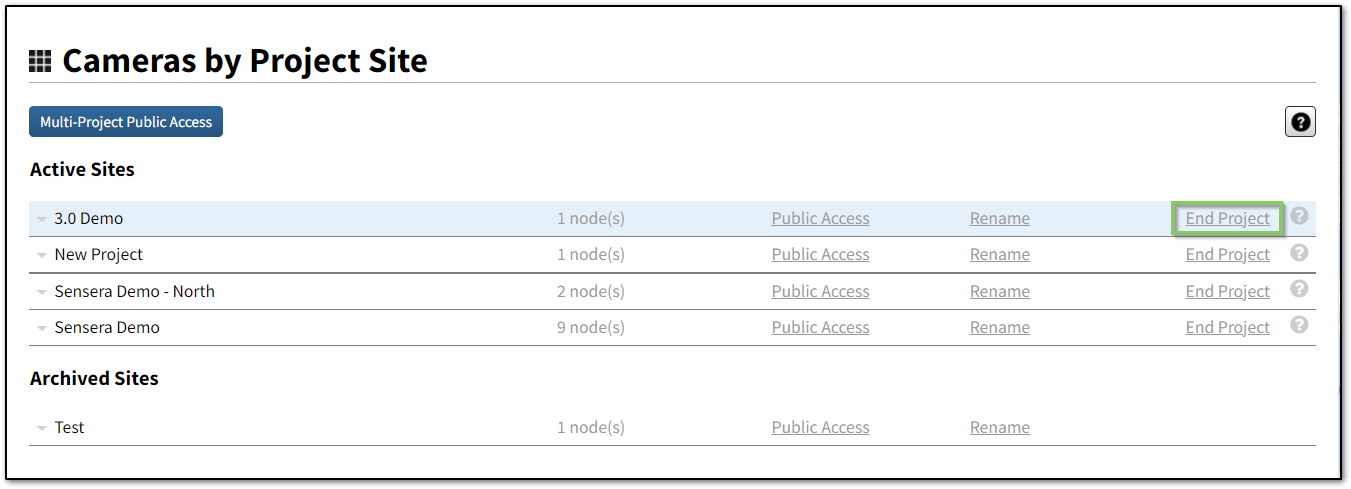
- Locate the correct site name under “Active Sites” and click on “End Project” on the far right
- Set the effective date for the archive – all images prior to and including this date will be part of the Archive for the cameras listed
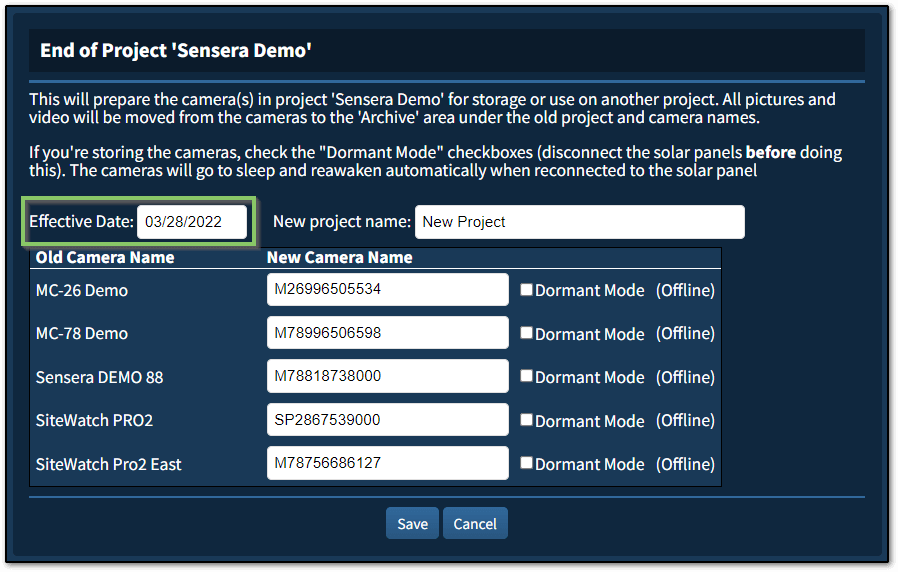
- Designate a new project name for the cameras to be organized under. If you do not yet have a new project planned for these cameras, you can use a placeholder name, like “Ready for New Project”. Note that individual cameras can later be moved to other projects (or new projects) individually or in groups as needed. The archived project will be found under the previous site name.
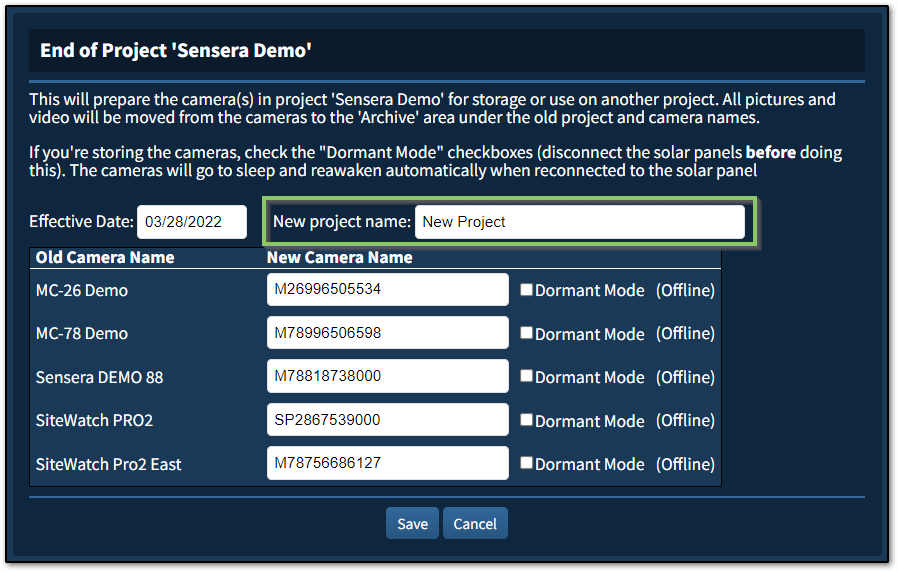
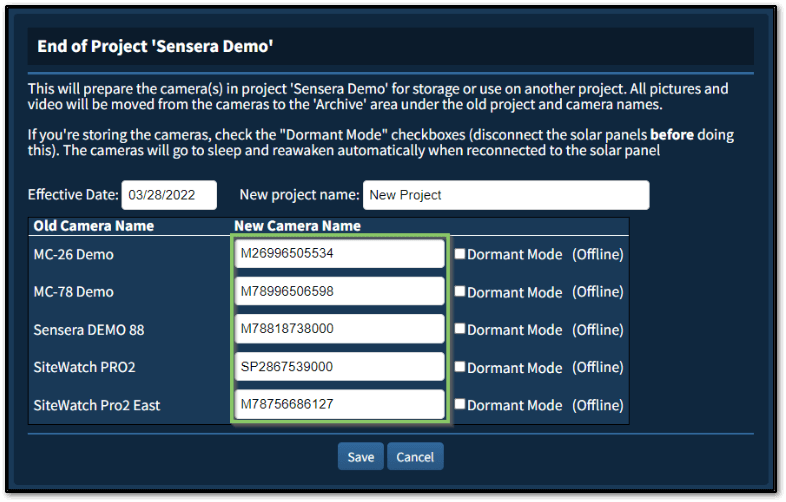
- Next, choose a new camera name for each camera listed which is not the same as a project name. You can use a placeholder name, like “Ready for New Project – Camera 1” or leave the name as the camera serial number if you do not yet have a new project or name for the camera in mind.
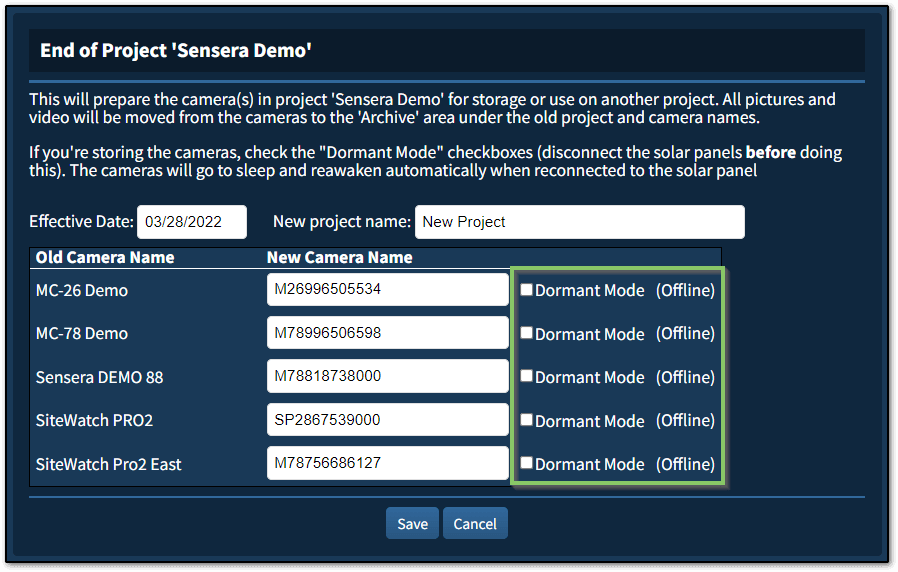
- Then, check the box next to “Dormant Mode” to put any listed camera in Dormant mode, which will help preserve its batteries during storage.Please Note: If the camera is already offline, it will not need to be placed in Dormant Mode
- Be sure to click “Save”

-
-
Accessing your Archived Media
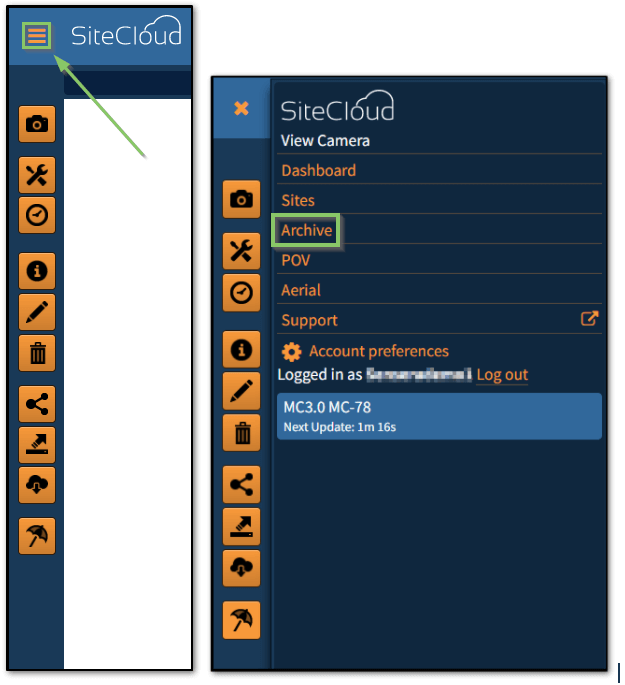
You can access your archived sites and cameras by clicking on the “Archive” tab in the upper right hand corner of the SiteCloud window. Your archived cameras and sites are organized exactly as they were in the “View” tab while they were actively capturing media.
Helpful Hint: The archiving process takes approximately 15-20 minutes to complete. While in the “View tab”, you may see images with the status “Moving” in the Captured Images pane during the archiving process.

