Keep Your Stakeholders in the Know With Public Access URLs
SiteCloud offers a variety of ways for the public to view images and videos from your Sensera cameras. By default, only authorized users can access the cameras. However, by enabling Public Access features, you can create web pages hosted on Sensera’s servers that anyone can visit without logging in.
There are three different varieties of Public Access pages available: The Single Camera Page, the Project Page, and the Multi-Camera Page.
Single Camera Page
This page displays a single camera’s latest image, with optional features like browsing older images, Auto Time-lapse Video, and live video streaming. The page also allows panning, zooming, and displays weather data.
To enable the Single Camera Page for one of your Sensera cameras:
You must have already created a SiteCloud account and registered your camera to perform these steps.
- Log in to SiteCloud and navigate to the View page.
- Select the camera you want to work with.
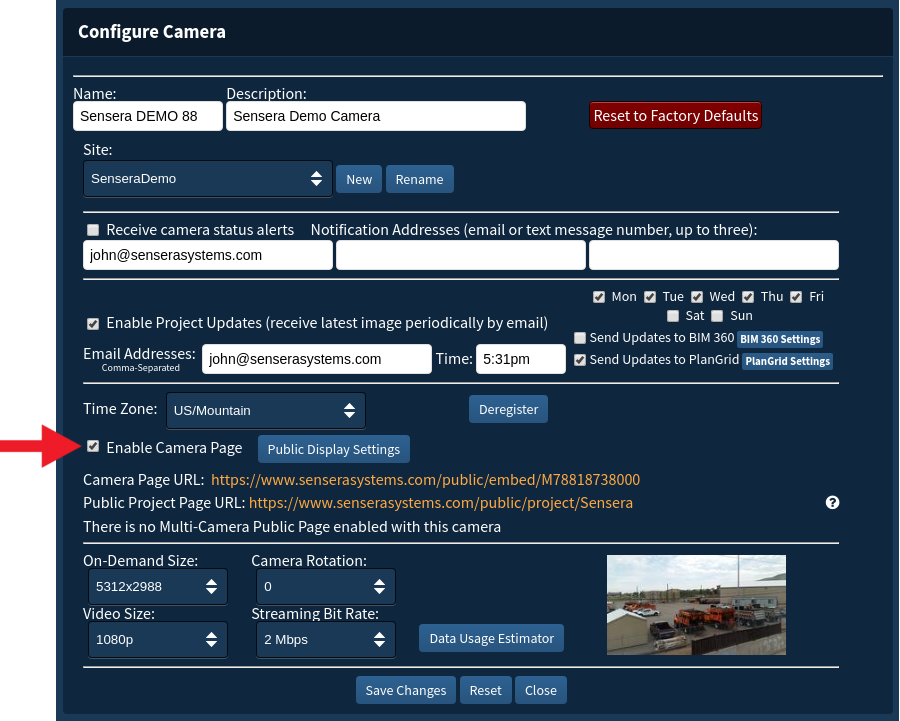
- Click on the “Configure Camera” button and select “Configure Camera” if necessary.
- Check the “Enable Camera Page” checkbox.

5. The Camera Page URL will appear. Click this link to visit the page.
6. To configure options, click “Public Display Settings” next to the “Enable Camera Page” checkbox.
7. Select the desired options and click “Save.”

To Embed the Single Camera Page in A Web Site
Your Single Camera Page is easy to embed in your own website. This allows your web designer to construct a fully customized presentation of your camera’s content.
- Create an iframe and set the Camera Page URL as shown in the Configure Camera dialog above as the “source”.
- The Single Camera Page will resize responsively, but for best results the aspect ratio (width / height) of the iframe should be fixed at 16:9 (1.778:1).
- Example:
- <iframe scrolling=”no” noresize=”noresize” src=”https://www.senserasystems.com/public/embed/[serial]” style=”height: 405px; width: 720px;”></iframe>
(Substitute your camera’s serial number for “[serial]” in the URL above.) In this example the width and height are hardcoded; if a resizeable view is desired we recommend using javascript to re-set the iframe size explicitly when necessary. Here’s a helpful tip: The Project Page and Multi-Camera page described below make use of embedded Single Camera Pages–check out those implementations for examples of responsive Single Camera Page embedding.
Project Page
Display multiple Sensera cameras from the same project along with information about the project and your company.
Steps to enable the Project Page:
- Log in to SiteCloud and go to the Sites page.
- Ensure all cameras for the Project Page are assigned to the same site.
- Click on the “Public Access” link for the site.
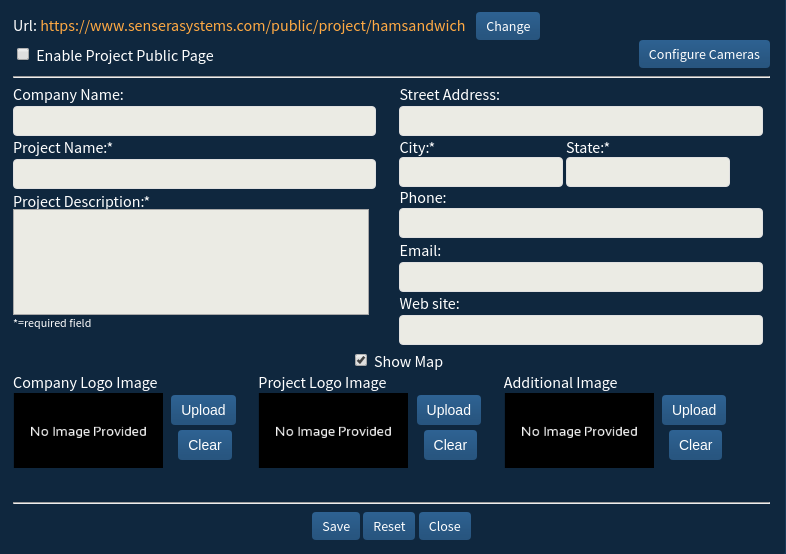
- Follow the prompts to select a URL and configure the page.

5. Configure camera features, project information, company information, and upload images.

Multi-Camera Page
Display cameras from different projects in one page.
Steps to enable the Multi-Camera Page:
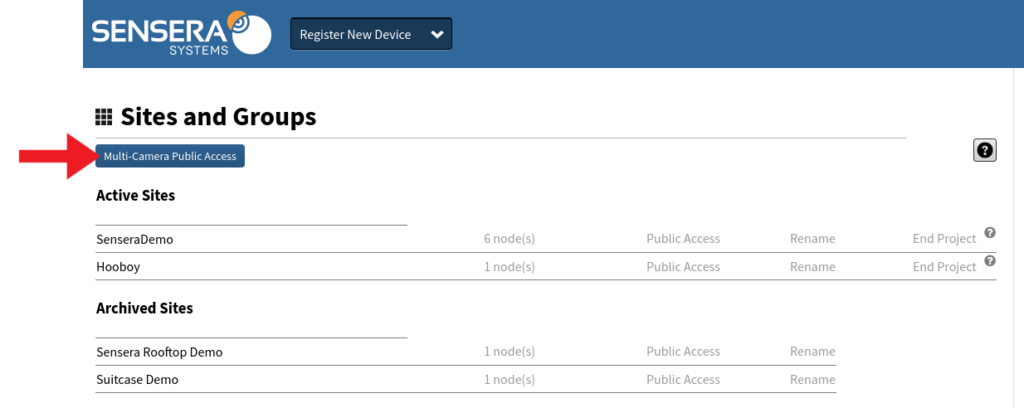
- Log into SiteCloud and go to the Sites page.
- Click the “Multi-Camera Public Access” button.
- From here on, the steps are the same as for the Project Page URL


