SiteCloud Navigation Guide
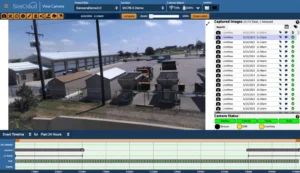
When you first log into SiteCloud, you will be taken into the View Page automatically. The View Page will be your primary hub for managing your Sensera Systems Camera.

The View Page consists of several useful sections, Lets go over each section together.
Navigation Section
At the top of the page, you will see the Navigation Section, which allows you to access (from left to right) the Page View window, the Site and Camera selection menus, Camera Network and Battery Status page, and layout options.

Page View Window
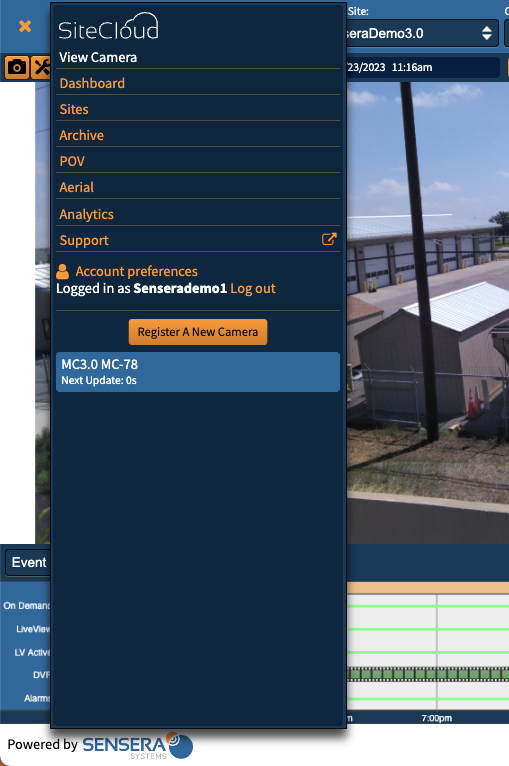
Within the Navigation Section, we have the Page View Window, which allows you to navigate to different sections of SiteCloud, as well as view the next scheduled camera connection update.

To preserve camera battery life and reduce cellular data usage, the camera does not constantly remain connected to SiteCloud, instead it will check in once every 5 minutes until it receives a new command. Once a command is received, the camera begins looking for new commands more frequently, once every 5 seconds. After an hour of inactivity the camera will begin to check in every 5 minutes once again.
Action Buttons
To the left of the page, you will see the orange colored Action Buttons, which is where most of the camera configuration options are located.
![]()
Camera
- Take Picture Now: Allows you to take an immediate “On Demand” (a la carte) picture which will display under “Captured Images”
- View Live Stream: Allows you to initiate live streaming so you can see your site in real time. Note: some items in the feature button column may be unavailable during use
![]()
Configure Settings
- Configure Camera (All Cameras): Allows a user to configure basic properties such as camera status alerts, project updates, and time zones. Users should also go here to review their “Data Usage Estimator“
- Configure DVR (MC78, 88, and SiteWatch Only): Allows a user to enable and configure their Digital Video Recorder (DVR) options where video or still images can be taken
- Configure LiveView (MC78, 88, and SiteWatch Only): Allows a user to enable and configure near real-time still images with shorter scheduling intervals
- Configure Motion Triggering (SiteWatch Only): Allows a user to configure a triggering schedule and take a series of still images or recorded video clip
- Configure VMD (SiteWatch Only): Allows a user to manage the area they are monitoring by masking and/or adjusting Video Motion Detection (VMD) sensitivity
- Configure Panorama (PTZ Only): Allows a user to manage the Panoramic Image Schedule and capture area.
![]()
Configure TimeLapse
- Play TimeLapse Video: Select this option to play the TimeLapse video the camera automatically created within the image viewer
- Download TimeLapse: Select this option to download an .MP4 video of your TimeLapse video
- Configure TimeLapse Schedules: Select this option to select the schedule for taking TimeLapse images along with the frequency
- Configure TimeLapse Video: Select this option if you’d like to customize your TimeLapse video from a date frame of pictures and/or duration
![]()
Image Info
- Display a window with camera setting information for the selected image
![]()
Annotate Image
- Annotate an image by drawing or typing on it with the color of your choice
- Annotations are saved with the image and can be displayed at any time within SiteCloud, individual sharing, or through export
- Saved annotations will be hidden by default
- For more information on annotation in SiteCloud, click here.
![]()
Delete Selected Images
- Permanently remove the selected image from your account
![]()
Share
- Send an individual image to an email address (Image must be less than 10 MB)
![]()
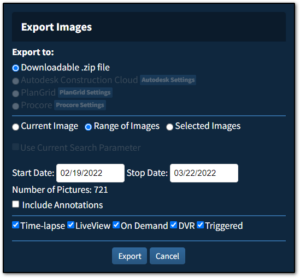
Export
- Export one or multiple images into a downloadable zip file
- Export a single image via Autodesk Construction Cloud
- Export a single image via PlanGrid
- Export a single image via Procore
- Export range of images based on image name, tag, or caption
- Select date range and types of images you want to export
- Include annotations, if any

![]()
Downloads
- Completed exports will appear here for download via a zip file
- Icon will display a yellow outline around it when files are ready to download
![]()
Show Weather at Camera Location
- Menu displays the weather information for the selected image when and where it was captured
Media Viewer
In the center of the page, we have the Media Viewing Window. This section is where any images or videos captured by your camera can be viewed.
The top of this section shows you the date/time the image was captured, allows you to select multiple images for direct comparison, adjust the image zoom slider, display annotations, and view the most recently captured media.
Captured Image Selector
To the right of the Media Viewer, we have the Captured Image Selector. This section allows you to view all media captured by your camera, and select the media that is displayed in the Media Viewing Window. Additionally you can add Tags or Notes to media, as well as Search Media by Date or Tag
Camera Status
Below the Captured Image Selector, we have the Camera Status. This section allows you to see your Camera Status at a glance, as well as easily know what additional features are currently active. When your camera is experiencing an issue, any relevant status option will turn RED. When a secondary feature is active, the feature will be highlighted in YELLOW.
Event Timeline
At the bottom of the page, we have the Event Timeline. This section allows you to see a Timeline view of all schedules and captured media. You can choose which Media Type to display and the Timeline period (Last Hour, Last 24 hours, Last Week, Last Month, or Custom Interval).

