Connect Your Camera to Your Wi-Fi Network
To ensure your camera works seamlessly with your Wi-Fi network, please follow the steps below. Make sure your camera is “Online” before proceeding.
Part I: Verifying the Camera is Online
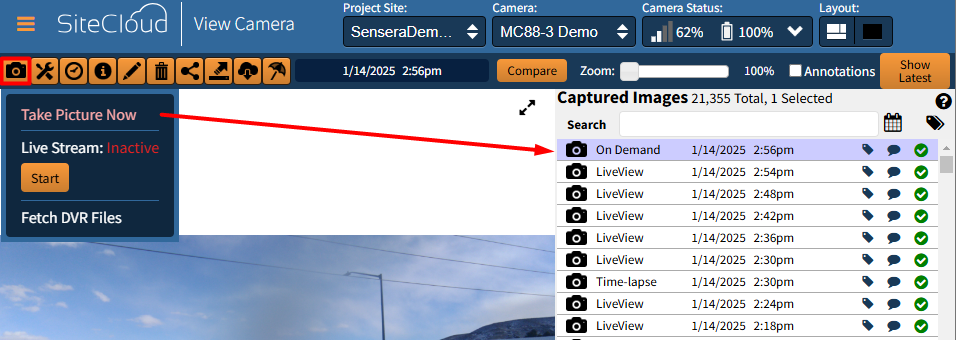
- Log into SiteCloud and look for the “Camera Status” section under the “View” page
- The “Comms” field should be green
- Using the camera icon, select “Take Picture Now“
- The “On Demand” picture will display on the “Captured Images” pane with a green check mark
- You have now verified the camera is “Online“
Part II: Configuring Wi-Fi
Note: You must choose a Wi-Fi network that utilizes WPA2 (or better) encryption and does not require signing in through a captive portal
- Log into your SiteCloud Account
- On the “View” page, verify the correct camera is listed in the drop down list
- Click the battery percentage and signal drop down at the top of the screen
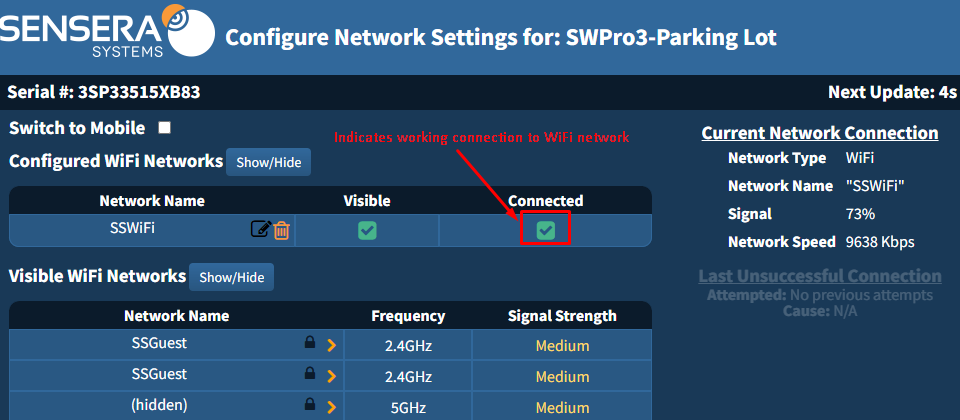
- Click the orange gear next to “Network” (Picture A)
- Allow the network scan to complete
- Click the orange arrow next to the desired network (Picture B)
- Enter the Wi-Fi Network password (case sensitive) and click “Connect“
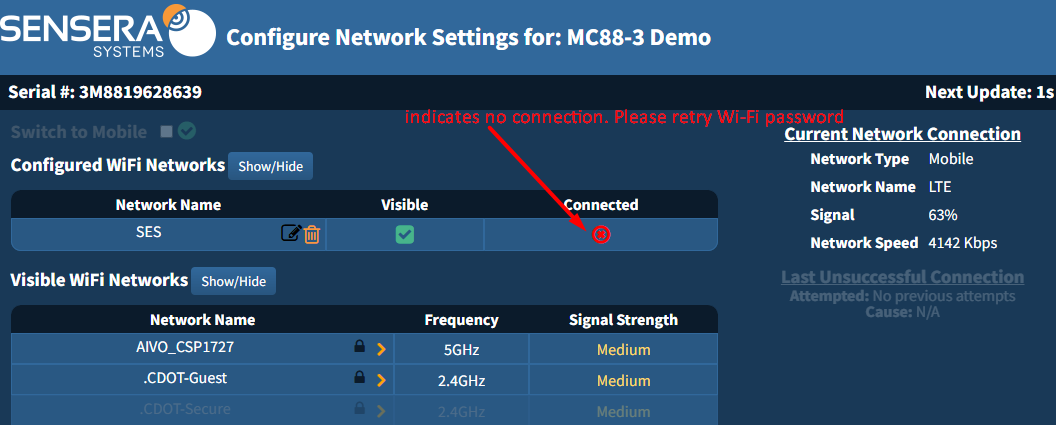
- Successful connections will be noted by a green check mark
- Confirm connection by taking another “On Demand” image
Please follow the steps above if you’re setting up Wi-Fi for the first time, switching from mobile to Wi-Fi, or connecting to a different Wi-Fi network.
(Picture A)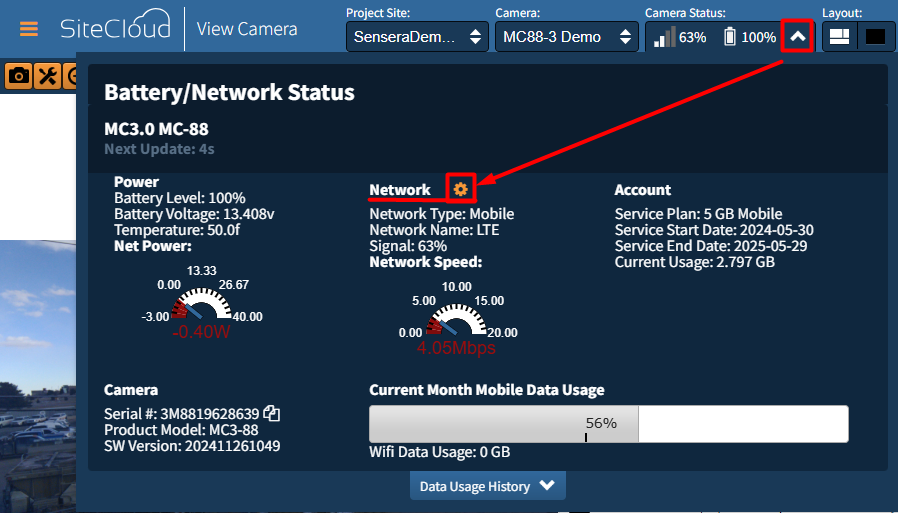
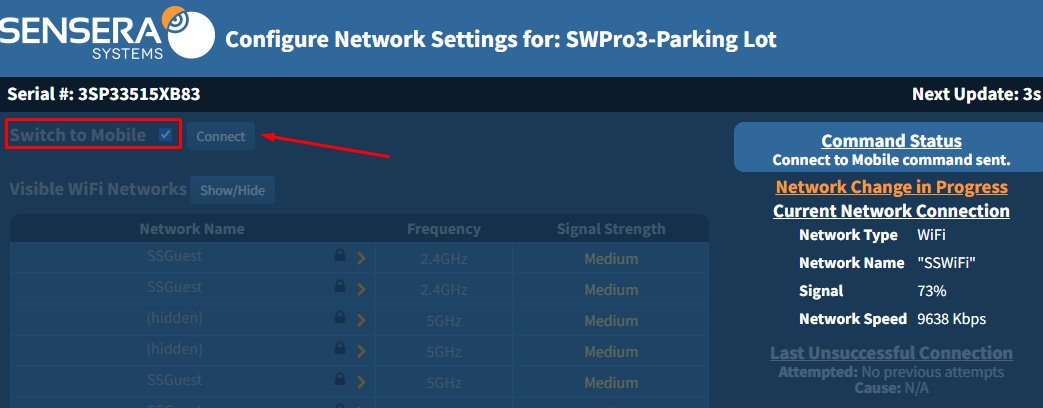
(Picture B)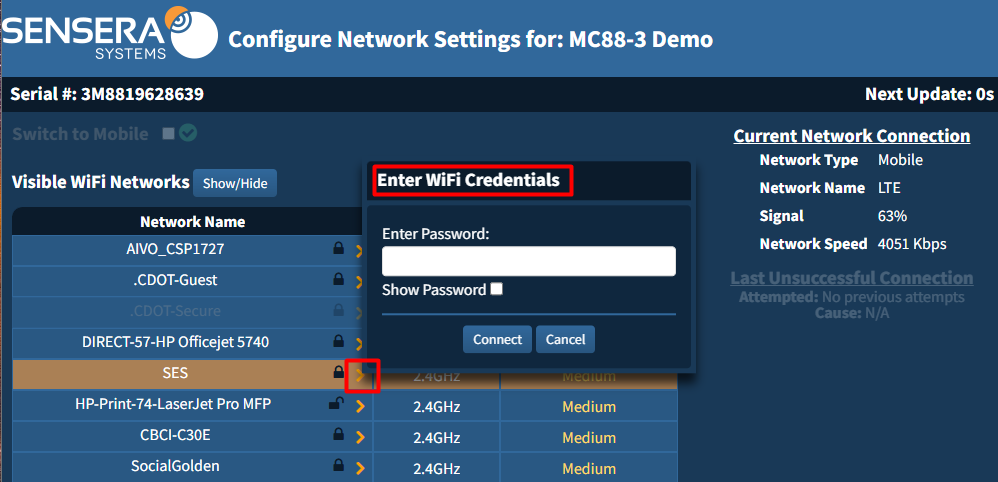
Please Note: If the camera can’t connect, it will revert to mobile after 5-10 minutes, and a message for the failed connection will appear under “Last Unsuccessful Connection.”
Additional Notes:
- Wi-Fi Network Sort: is listed in order of signal strength
- Padlock Icons: indicate a password is required to access the network
- Hidden Wi-Fi Network: displays within parentheses. Users attempting to access a hidden network will need to enter their SSID and Wi-Fi password
- In order to connect to Wi-Fi: The network security type must either be WPA, WPA2, or open.
- Additionally, if the chosen Wi-Fi network uses a ‘captive portal‘ this additional sign-in will prevent a Sensera camera from being able to use that network.
Part III: Configuring Mobile
Customers who switch their camera Wi-Fi service plan to mobile, can also do so in the same screen by doing the following
- Log into your SiteCloud Account
- On the “View” page, verify the correct camera is listed in the drop down list
- Click the battery percentage and signal drop down at the top of the screen
- Click the orange gear next to “Network”
- Select “Switch to Mobile” at the top of the screen (Picture C)
- Click “Connect“
- Successful connections will be noted by a green check mark next to “Switch to Mobile“
- Confirm connection by taking another “On Demand” image
Please note:
- Establishing a mobile connection may take up to 5 minutes
- Unsuccessful mobile attempts will revert your setting back to Wi-Fi
Part IV: Additional Information
Network Name or Password Changes: Before updating these items, ensure the camera is set to mobile. This will allow you to keep the camera online and reconfigure the Wi-Fi network for your camera
Moving Cameras: Cameras that only need to be moved and should remain online, will require that users switch the camera to “Mobile“. This will keep the camera online and allow you to configure the new Wi-Fi network at the next location
Part V: Service Plan Changes
As users manage network changes on their cameras, customers must ensure they have the correct service plan purchased. To ensure alignment, please contact our support team and any plan changes will be redirected to our finance team.

