Setting Up Project Updates by Email
To set up project updates by email follow these easy steps:
- Log into SiteCloud.
- On the VIEW page, click on the Tools icon.
![]()
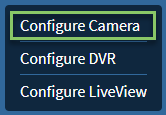
- Click on Configure Camera.
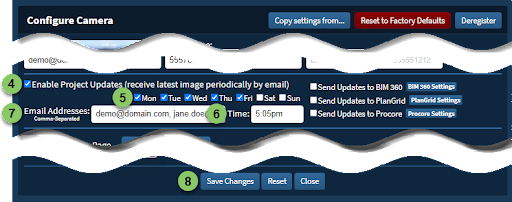
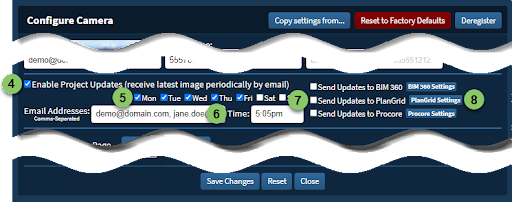
- Click the checkbox for Enable Project Updates.
- Check the boxes for the days when the latest picture should be sent.
- Set the time you would like as the cutoff for the last image before sending. (Ex: You have Time-lapse images set for every 15 minutes and the one that will happen at 5pm is the one you want to be sent as an update. We suggest making the time in this box 5:05pm to ensure that the has time to be uploaded to our servers, processed, and is prepared to be sent.)
- Enter Email Addresses in the field provided with a comma between them.
- Click Save Changes.
————————————————————————————————————————————————————————
Setting Up Project Updates to Procore
- Log into SiteCloud.
- On the VIEW page, click on the Tools icon.
![]()
- Click on Configure Camera.

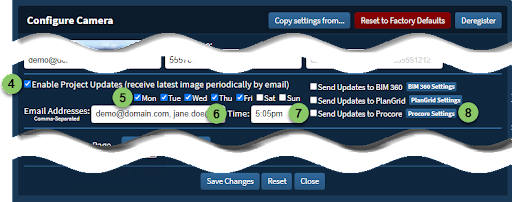
- Click the checkbox for Enable Project Updates.
- Check the boxes for the days when the latest picture should be sent.
- Set the time you would like as the cutoff for the last image before sending. (Ex: You have Time-lapse images set for every 15 minutes and the one that will happen at 5pm is the one you want to be sent as an update. We suggest making the time in this box 5:05pm to ensure that the has time to be uploaded to our servers, processed, and is prepared to be sent.)
- Click the checkbox for Send Updates to BIM 360.
- Click the Procore Settings button.
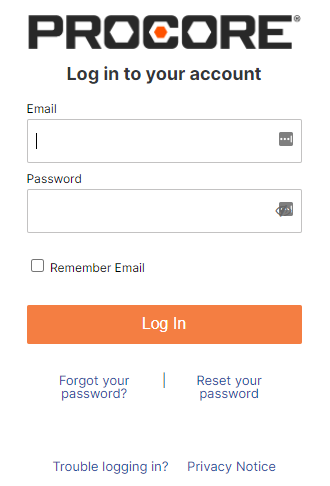
- Click the Login button.
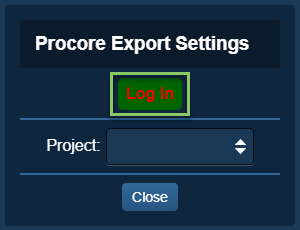
- Follow the steps in Procore to connect it.
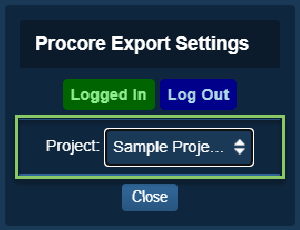
- On the Sensera Systems’ Procore Export Settings window, make certain the right project is selected from the dropdown.
- Click Save Changes.

————————————————————————————————————————————————————————
Setting Up Project Updates to PlanGrid
- Log into SiteCloud.
- On the VIEW page, click on the Tools icon.
![]()
- Click on Configure Camera.

- Click the checkbox for Enable Project Updates.
- Check the boxes for the days when the latest picture should be sent.
- Set the time you would like as the cutoff for the last image before sending. (Ex: You have Time-lapse images set for every 15 minutes and the one that will happen at 5pm is the one you want to be sent as an update. We suggest making the time in this box 5:05pm to ensure that the has time to be uploaded to our servers, processed, and is prepared to be sent.)
- Click the checkbox for Send Updates to BIM 360.
- Click the PlanGrid Settings button.
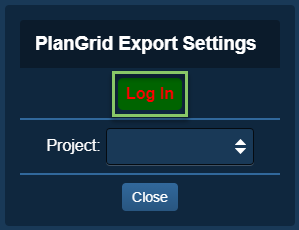
- Click the Login button.
- Follow the steps in PlanGrid to connect it.

- On the Sensera Systems’ PlanGrid Export Settings window, make certain the right project is selected from the dropdown.
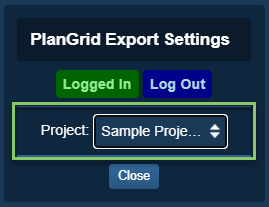
Click Save Changes.
————————————————————————————————————————————————————————
Setting Up Project Updates to Autodesk Construction Cloud
- Log into SiteCloud.
- On the VIEW page, click on the Tools icon.
![]()
- Click on Configure Camera.

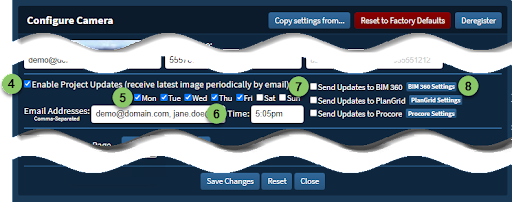
- Click the checkbox for Enable Project Updates.
- Check the boxes for the days when the latest picture should be sent.
- Set the time you would like as the cutoff for the last image before sending. (Ex: You have Time-lapse images set for every 15 minutes and the one that will happen at 5pm is the one you want to be sent as an update. We suggest making the time in this box 5:05pm to ensure that the has time to be uploaded to our servers, processed, and is prepared to be sent.)
- Click the checkbox for Send Updates to Autodesk Construction Cloud.
- Click the Autodesk Construction Cloud Settings button.
- Click the Login button.
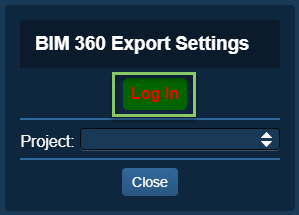
- Follow the steps in Autodesk Construction Cloud to connect it.
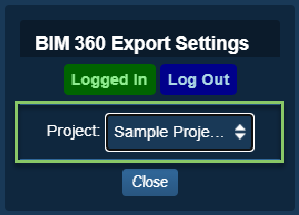
- On the Sensera Systems’ Autodesk Construction Cloud Export Settings window, make certain the right project is selected from the dropdown.
- Click Save Changes.


